


Cylinder Pose Reader and Soft Mod Deformer
- Jan 25, 2018
- 3 min read
So over the weekend I built this baby rig. A majority of the rig was straightforward but the area where his hip meets his diaper presented some challenges. Ordinarily I would do an out, forward, and back corrective blend shape and then use a spherical pose reader to drive them, but I thought I would try doing something new, using a the soft mode deformer.
So a soft mod deformer has a center, a falloff radius, a falloff graph, a transform matrix, and paint-able weights. A transform matrix (to put it simply) is the set of translate, rotate, and scale values the deformer takes as inputs.
Most people use this as a quick stand-in for a cluster because it has an automatic falloff and can be applied alongside skinning.
That by itself can give you some nice results, but because you have more control over the behavior of the soft mod deformer you can use it to create some more interesting results.
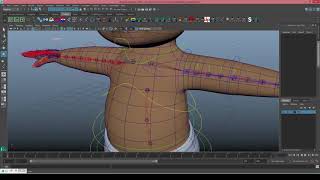
In the example above, I am driving the falloff center using the translate x and translate z attributes on the control, and only driving the transform matrixes translate y value. I also hooked the scale of the control into the falloff of the deformer.
As you can see the softMod deformer can be pretty useful if used properly, and I wanted to try and apply it to the baby rig. In this case I wanted the hip joint to drive the soft mode deformer so that it collided and pushed the diaper no matter how I moved the leg. In order to do this I needed to have the sculpt deformers center be close to the collision point, and the transform matrix needed to be away from the leg. Now you could try and finess a sculpt deformer to get that result but this was an experiment.
This is the system I settled on used :
A locator at the knee that is a child of the hip joint.
A sphere at the hip that is a sibling of the hip joint.
A cylinder that is a child of the hip twist reader (meaning it followed the hip but never twisted along the primary axis).
And of course a softMod deformer.
The locators position is plugged into a closestPointOnSurface node in order to find the point on the sphere that the hip bone passed through. Then the UV coordinated of that point where plugged into a pointOnSurfaceInfo node in order to find the position on the cylinder with the desire UV coordinated. This point was used as the center of the of deformer, and the normal of the cylinder was used as the transform matrix. Below you can see the final product.
The issue was that remapping coordinates to the cylinder didn't put the deformer center where it needed to be to get the desire effects. Maybe creating a modified cylinder shape would get better results. There's still a lot room for exploring this technique.
So in the end it wasn't very good when it comes to art direction, but it was nice to try out the softMod deformer more, and maybe the technique of remapping from a sphere to a cylinder to get normals could be used elswhere. I could see this technique being used on a wrist with greater success because it is a ball joint which would benefit from having more than just 4 corrective sculpts, and it is more cylindrical than the hip/pelvis region.


Comments